

Whereas I love math, I do not excel in the knowledge of said math or patience. So like many of us lesser skilled math enthusiasts I tend to look for the easiest way through a problem.
Some of the concepts we will use.
- Global Variables
- Array of Characters
- len() function
- for() loop
- rotate()
- text()
- linear_extrude()
Let’s Start with the text, you can use this tutorial to learn more about the text() command, for this tutorial start by adding simple text(); with one letter.
text(“T”);
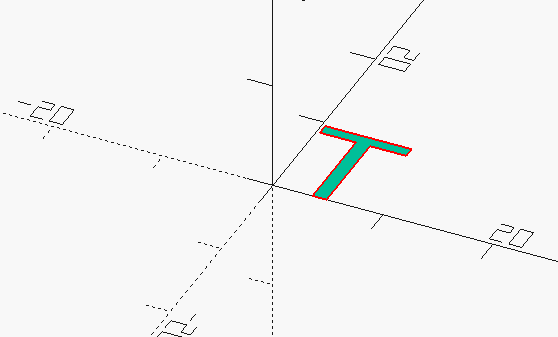
We will need to extrude the letter so it has three dimensions. We will set the extrusion length to 1, or we will have a ten unit long T.
linear_extrude(1) text("T");
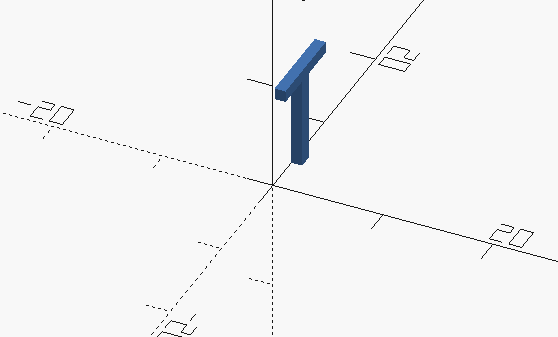
Being as we will be removing the text from the curved face of the cylinder we will need to rotate it so it is correctly oriented. The rotatation around the X axis will place the bottom of the letter on the XY Plane. The rotation around the Z Axis will face the letter flat to YZ Plane.
rotate([90,0,90])
    linear_extrude(1) text("T");
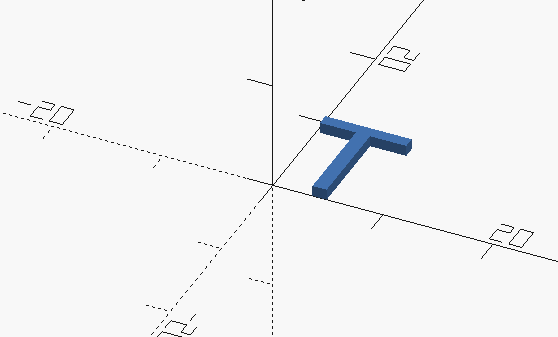
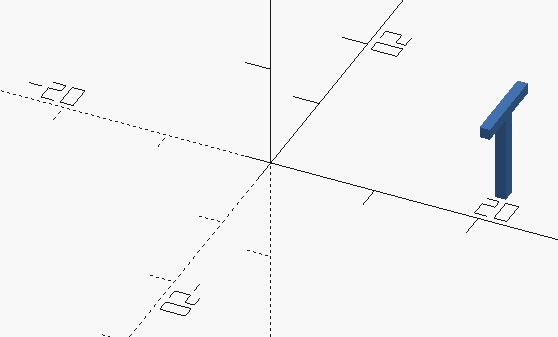
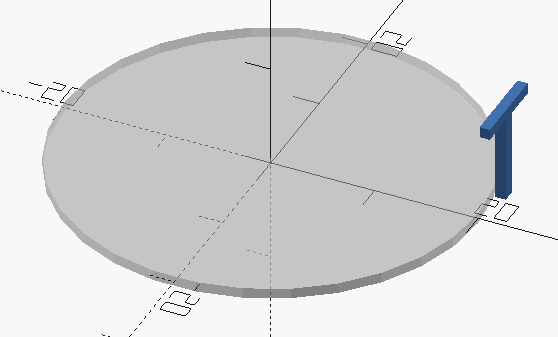
We will want to move the letter to the edge of cylinder so we will need a radius, lets kill two birds with one stone. Let’s add a RADIUS variable and use that. Then Translate our letter along the X axis ( because we are facing YZ plane ) the distance of the Radius.
RADIUS=20;
translate( [RADIUS,0,0])
    rotate([90,0,90])
        linear_extrude(1) text("T");
Now let’s add a Cylinder, but we will “disable it” so we can see what we are doing. Use the % modifier to make the cylinder translucent. Make the height 1 unit and center the cylinder on the origin. Centering will help a great deal with correctly aligning the text
RADIUS=20;
%cylinder(r=RADIUS,h=1,center=true);
translate( [RADIUS,0,0])
    rotate([90,0,90])
        linear_extrude(1) text("T");
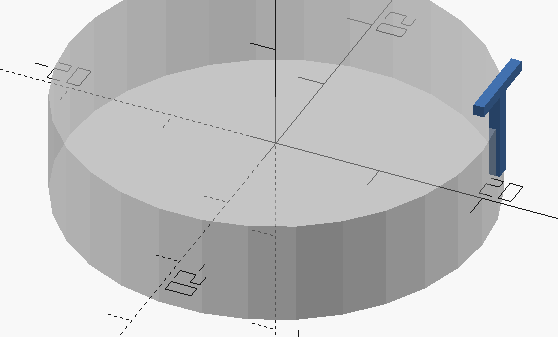
Let’s move the extrusion into the cylinder so that we can see how it will remove material. We will just multiply the Radius by .95 so the letter doesn’t go out quite as far. Also, lets make the cylinder taller. Change h=1 to h=10.
RADIUS=20;
%cylinder(r=RADIUS,h=10,center=true);
translate( [RADIUS*.95,0,0])
    rotate([90,0,90])
        linear_extrude(1) text("T");
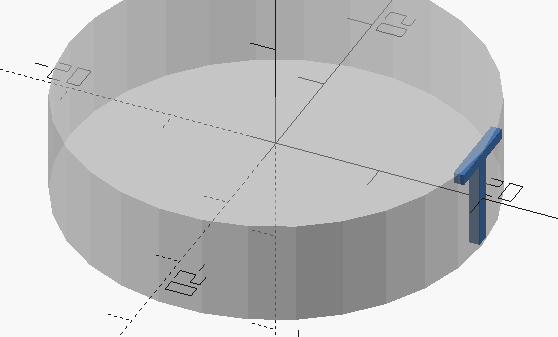
If we look from above we can see only part of the letter is remove. We want the face of the letter tangent to the wall of the cylinder. The text() command has alignment. and we can use that to complete the task.
RADIUS=20;
%cylinder(r=RADIUS,h=10,center=true);
translate( [RADIUS*.95,0,0])
  rotate([90,0,90])
    linear_extrude(1)
      text("T",valign="center",halign="center");
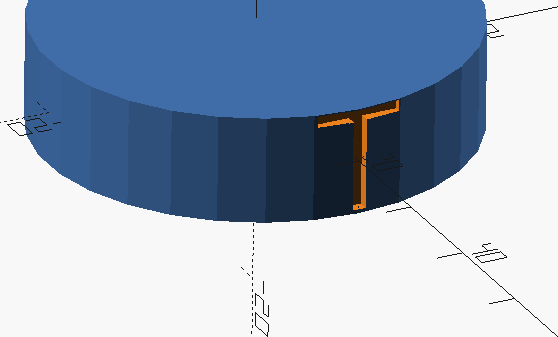
We have a perfectly embedded letter. If we use difference and remove the % we can get a good preview.
RADIUS=20;
difference(){
  cylinder(r=RADIUS,h=10,center=true);

  translate( [RADIUS*.95,0,0])
    rotate([90,0,90])
      linear_extrude(1)
        text("T",valign="center",halign="center");
}
This is all well and good for one letter but it won’t work for anything more. If we set the text to a word it just goes off to the sides, and won’t remove the correct material.
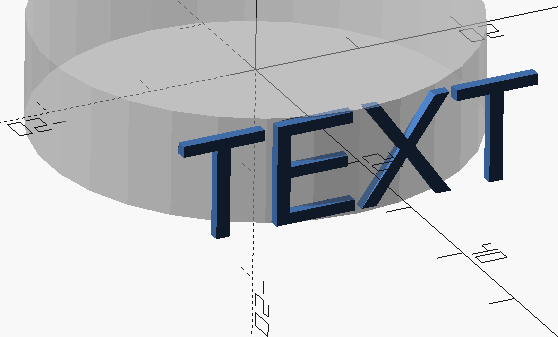
We will add an array of characters that can be added and rotated one at a time.
RADIUS=20;
stext = [ "T","E","X","T" ];
difference(){
  cylinder(r=RADIUS,h=10,center=true);

  translate( [RADIUS*.95,0,0])
    rotate([90,0,90])
      linear_extrude(1)
        text("T",valign="center",halign="center");
}
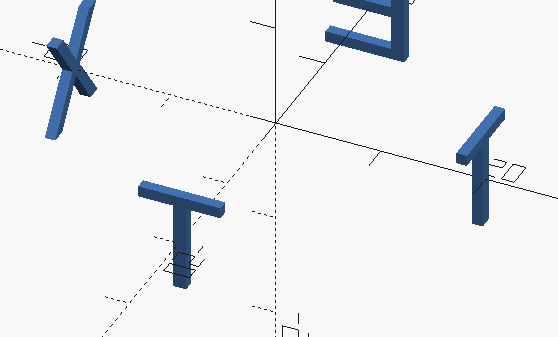
This gives us four character to space evenly around the cube. Let’s add a for() loop to add all four letters. and the for() loop in line 5 and change the string “T” in the text command to stext[i]. As we loop through i will count up values 1 through 4 and that character will be added.
RADIUS=20;
stext = [ "T","E","X","T" ];
difference(){
  cylinder(r=RADIUS,h=10,center=true);

for(i=[0:1:4]){
  translate( [RADIUS*.95,0,0])
    rotate([90,0,90])
      linear_extrude(1)
        text(stext[i],valign="center",halign="center");
  }
}
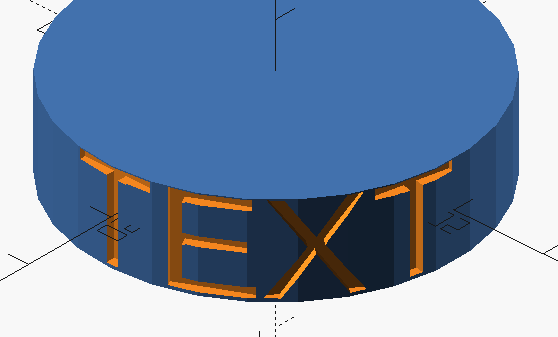
That’s not enough though, as now we just have all four letters piled up on each other. We need to rotate the letter around the circumference. We can add another rotation to complete this task. We will add a rotate() that rotates the letter ( and it’s rotations and transforms ) around the Z axis by 90 degrees times the value of the variable i. We will end up with 4 roations 90,180,270,360. Don’t forget the brackets {} to enclose the entire text command with the extrusion, rotate and translate.
RADIUS=20;
stext = [ "T","E","X","T" ];
difference(){
  cylinder(r=RADIUS,h=10,center=true);

for(i=[0:4:1]){
  rotate([0,0,i*90]){
    translate( [RADIUS*.95,0,0])
      rotate([90,0,90])
        linear_extrude(1)
          text(stext[i],valign="center",halign="center");
    }
  }
}
We can even set the rotation to smaller values:
But we need to be more dynamic, so that it is easier to change the text. We can use the len() function to count the values in the array. Then we use that value in the for() loop and even calculate a rotation angle for the rotation.
RADIUS=20;
stext = [ "M","Y"," ","T","E","X","T" ];
chars = len( stext );

difference(){
 cylinder(r=RADIUS,h=10,center=true);

for(i=[0:1:chars]){
  rotate([0,0,i*360/chars]){
    translate( [RADIUS*.95,0,0])
      rotate([90,0,90])
        linear_extrude(1)
          text(stext[i],valign="center",halign="center");
    }
  }
}
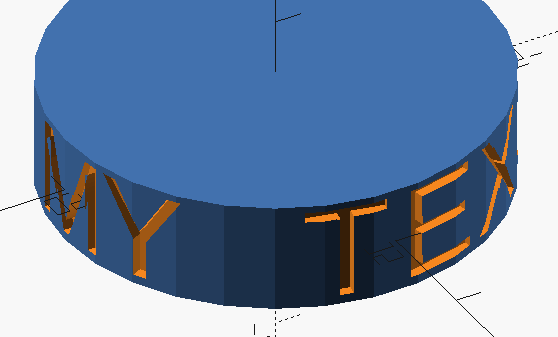
Now we are getting somewhere, but it would be nice to be able to constrain the text to just a portion of the cylinder. Let’s change the 360 used in the rotation to a variable. Let’s use ARC_ANGLE. Let’s set it to half the perimeter and make the text a little smaller with the size=, keyword. The size keyword set’s the total height of the text to the units given.
RADIUS=20;
ARC_ANGLE=180;
stext = [ "M","Y"," ","T","E","X","T" ];
chars = len( stext );

difference(){
 cylinder(r=RADIUS,h=10,center=true);

for(i=[0:1:chars]){
  rotate([0,0,i*ARC_ANGLE/chars]){
    translate( [RADIUS*.95,0,0])
      rotate([90,0,90])
        linear_extrude(1)
          text(stext[i],size=9,valign="center",halign="center");
    }
  }
}
So that is pretty much all you need to add text to side of a cylinder. And no complicated Trig. We could enhance this even further by making it a module, adding more Variables so it is more dynmic and probably more.
If you can think of a way to make it even easier ( other than use different software ) feel free to leave a comment.
This is very handy, indeed! If you knew the “em-width” of a given font, you could calculate an angle based on that, and would no longer have to specify an ARC_ANGLE: You could just constrain each character to take up the same amount of space as the largest character. Or, you could use that as the minimum value for ARC_ANGLE.
The “em-width” would vary based on the font family and size, and it would be maximally convenient if it could be queried from the text() object.
Just saw this now. Un-fortunately, OpenSCAD doesn’t seem to have anyway of return the width of each character, even though it has this value intrinsically. OpenSCAD is able to center single characters or whole words based on their width. But this information doesn’t seem to be exposed. OpenSCAD also doesn’t have any kind of instrospection that I know so you can’t even ask it the length of an object that has been added.
You are right tho if we could get the width of each character we could make much better cylindrical text.