
OpenSCAD does not have a built in Array command but we can easily create an array with a for loop, or even create an array module, and have our own command.
If you have not already learned about using for loops in OpenSCAD take a look at this tutorial:
Linear Array with a For Loop
To create a linear array in OpenSCAD is pretty straight forward. The measurements will be embedded in the Step and End values of the Loop.
Normally a basic forloop in OpenSCAD looks like this
for ( i=[start:count:end] )
But for our linear array we can think of like
for (i =[ origin : spacing : distance ] )
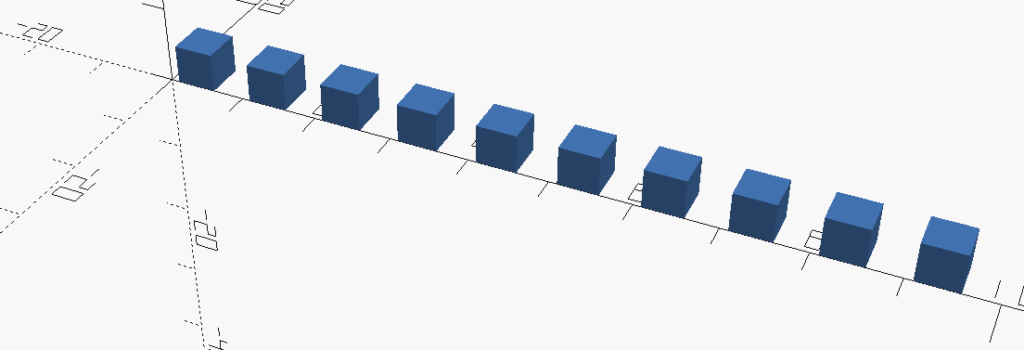
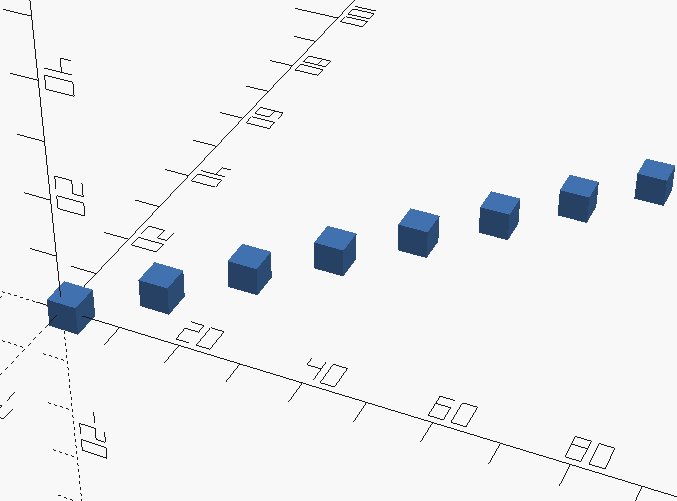
So in the example below, we have a cube 5 unit cube at 0,0 then one cube every 10 units, in both the X and Y direction, ending with a cube centered at 100 units.
for ( i=[0:10:100]) {
    translate([i,i,0])
    cube(5,center=true);
}
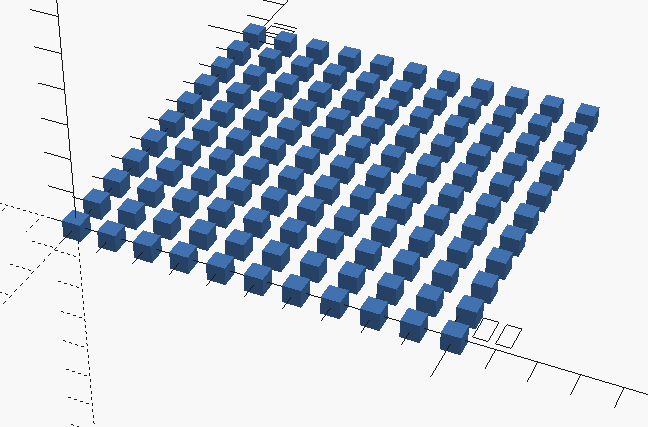
With an additional loop we can create a grid of objects.
for ( i=[0:10:100]) {
for ( j=[0:10:100]) {
    translate([i,j,0])
    cube(5,center=true);
}}
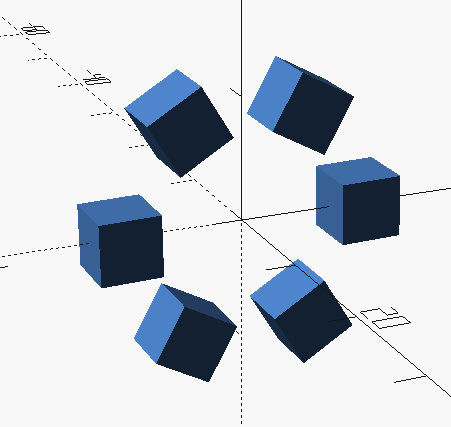
Polar Array with a For Loop
The Polar array is very similar, but instead of translating we use the loop value in a rotate command.
Just like linear array we can re-think of our for loop like this.
for ( i=[ START OF ARC: DEGREES: END OF ARC )
We use the translate([]) command to add a radius to the polar array. The radius will be the axis perpendicular the rotational axis, for a basic polar array.
translate([0,RADIUS])
To create a full polar array we start at zero degrees and go all the way around to 360 degrees.
for ( i=[1:10:360]) {
    rotate([i,0,0])
    translate([0,30])
    cube(5);
}
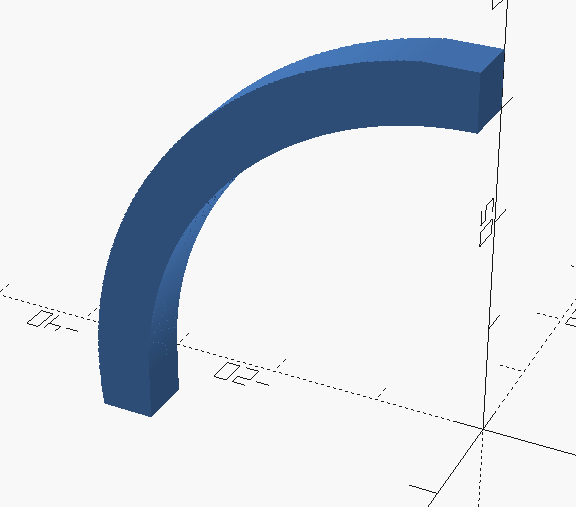
It is fairly simple to create arc segments. The following code we create an array of cubes from 90 degrees around the x Axis to 180 degrees.
for ( i=[90:1:180]) {
    rotate([i,0,0])
    translate([0,30])
    cube(5);
}
Simple Linear Array as a Module
We can easily create a linear array “command” using the module and children command. We will create a basic linear array that extends on a single axis and uses spacing to create a number of objects. This version will always make an array of whatever object it precedes on the X axis
linear_array( 10,10) cube(5);

module linear_array( count, spacing ){
    for ( i=[0:spacing: spacing * count]) {
       translate( [i,0,0])
       children();
    }
}
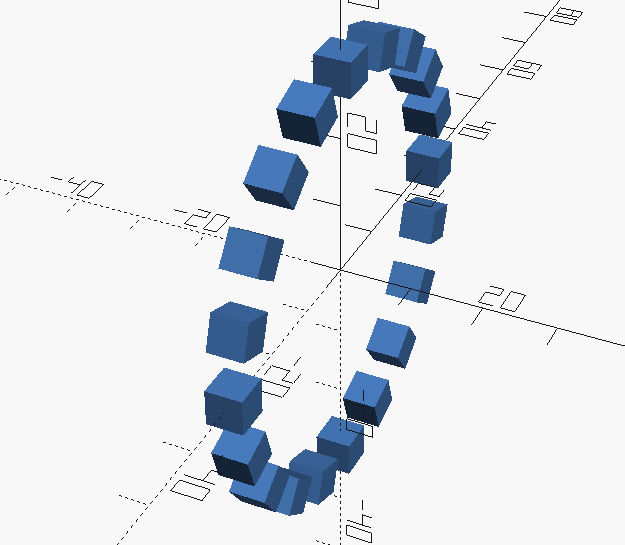
Simple Polar Array as a Module
Our polar array works similarly to the linear array but instead of linear spacing we give the module the number of items and the spacing in degrees. We need a third parameter for the radius of the array. The result polar array will be a full circle only when the count and degrees multiply to 360, otherwise it will always be an arc starting from 0 degrees
polar_array( 20, 18, 30 ) cube(5,center=true);

module polar_array( count, degrees, radius ){
    for ( i=[0: degrees: count * degrees]) {
       rotate( [i,0,0])
       translate([0,radius,0])
       children();
    }
}
Here are the two of them, so you can use them in your code, or add them to your library folder.
module linear_array( count, spacing ){
    for ( i=[0:spacing: spacing * count]) {
       translate( [i,0,0])
       children();
    }
}

module polar_array( count, degrees, radius ){
    for ( i=[0: degrees: count * degrees]) {
       rotate( [i,0,0])
       translate([0,radius,0])
       children();
    }
}